When dealing with boot problems, knowing some reinforce boot ankle diy techniques can be a lifesaver. Tackling these issues without professional help might seem daunting, but several simple DIY solutions can help make your boots more comfortable and durable:
- Use leather conditioners or mink oil to soften and maintain leather.
- Add padded insoles and moleskin patches to increase comfort and support.
- Properly stretch your boots to alleviate tightness and prevent ankle pain.
For immediate answers, check out the detailed infographic below that outlines these solutions.
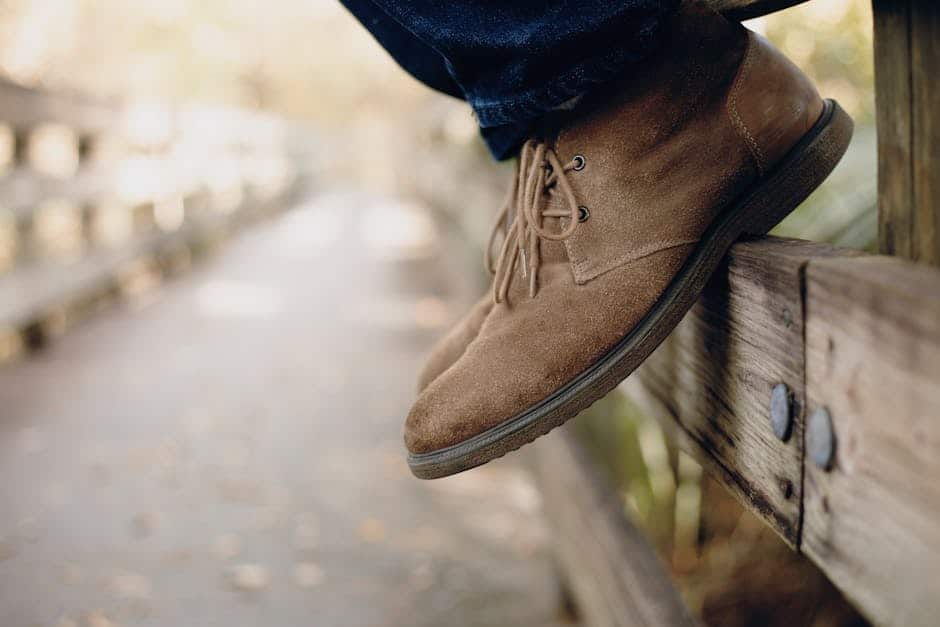
Boots are more than just footwear; they’re an important investment in comfort and style. But, like any valuable possession, they can encounter issues, especially around the ankle area. This guide aims to equip you with easy and practical solutions to ensure your boots are supportive, just like the experts at NuShoe would recommend.
I’m Eric Neuner, the founder of NuShoe Inc. Since 1994, I’ve dedicated my expertise to the art of shoe repair, including exploring methods for reinforce boot ankle diy projects. I’m here to share insights that reflect my experience in shoe craftsmanship and repair.

Simple guide to reinforce boot ankle diy:
– how to repair cracked rubber shoe soles
– hush puppies shoe sole replacement
– new balance 574 sole replacement
Understanding Boot Ankle Issues
Boot ankle pain can turn your stylish footwear into a daily discomfort. Recognizing common problems and their causes is the first step in finding effective solutions.
Common Boot Ankle Problems
-
Ankle Rubbing: This often occurs when the boot’s side seams are too stiff or poorly aligned. The constant friction can lead to blisters or sore spots.
-
Heel Slippage: A loose fit around the ankle leads to the heel slipping up and down, causing discomfort and potential injury.
-
Stiff Leather: New boots commonly have stiff leather, which can dig into the ankle area.
-
Tight Fit: A snug fit can restrict movement and cause pain around the ankle.
Causes of Boot Ankle Pain
-
Poor Fit: The wrong size or shape of the boot can lead to excessive pressure on the ankle.
-
Inadequate Support: Lack of proper arch or ankle support can exacerbate existing foot issues.
-
Material Stiffness: Unsoftened leather can be unforgiving on the ankle, especially in new boots.
-
Design Flaws: Certain boot designs might not accommodate the natural movement of your ankle.
Understanding these issues helps in applying the right reinforce boot ankle diy techniques. With a bit of effort, you can transform your boots into a perfect fit for your feet.

In the next section, we’ll dive into essential tips for reinforcing your boots, ensuring comfort and longevity.
Reinforce Boot Ankle DIY: Essential Tips
When it comes to making your boots more comfortable, a few simple reinforce boot ankle diy methods can make a big difference. Let’s explore some key techniques.
Using Leather Conditioner and Mink Oil
One of the first steps in softening stiff leather is to apply a good leather conditioner. Products like Chamberlain’s Leather Milk can penetrate the leather, making it more pliable and less likely to rub against your ankles. If you’re okay with darkening the leather slightly, consider using Bee Natural Rain and Snow. This product not only conditions but also adds a layer of protection against the elements.
Tip: Apply a thin layer of conditioner, let it soak in overnight, and wipe off any excess the next day.
Adding Padded Insoles and Moleskin Patches
Impact-reducing insoles can be a game-changer, especially if you spend long hours on your feet. These insoles provide extra cushioning, reducing the strain on your ankles and the rest of your foot. If specific areas of your boot cause discomfort, moleskin patches can offer targeted relief. Simply cut a piece and stick it to the inside of the boot where it rubs.
Tip: Test the insole fit with your socks to ensure you still have enough room in your boots.
Properly Stretching Your Boots
If your boots are too tight, stretching them can help. A stretching fluid can be applied to the tight areas to help relax the leather fibers. Combine this with a flex-break-in technique by bending the boot gently at the sole and ankle to simulate walking motions.
For stubborn spots, consider the ball bat technique. This involves gently using a bat or similar object to press against the inside of the boot, loosening the material where it’s tightest.
Tip: Always be gentle with stretching to avoid damaging the leather.
By using these methods, you can turn uncomfortable boots into a pair you love to wear every day. Next, we’ll explore how to stiffen leather boots at home to maintain their shape and support.
How to Stiffen Leather Boots at Home
Sometimes, your boots need a little help to maintain their shape and offer better support. Let’s explore some DIY methods to stiffen leather boots right at home.
Hot Water Method
The hot water method is a popular way to stiffen leather. It involves briefly dunking the leather in hot water. Here’s how to do it:
-
Fill a Basin: Use warm water, not boiling, as extreme heat can damage leather.
-
Dunk the Boots: Submerge the boots for a short time, around 30 seconds to a minute. This softens the leather enough to reshape it.
-
Shape and Dry: While the leather is still pliable, shape the boots as needed. Then, let them dry naturally at room temperature to stiffen up.
Tip: Avoid direct heat sources like heaters or sunlight, as they can make the leather brittle.
Using Metallic or Plastic Strips
If you want to prevent your boots from slouching, metallic or plastic strips can be a great solution. This method supports the boot’s structure, keeping them upright and crisp.
-
Choose Your Material: Use thin metallic strips or sturdy plastic. These materials provide the necessary rigidity without adding too much bulk.
-
Attach the Strips: Insert the strips inside the boot, securing them near the ankle area. You can use adhesive tape or sew them in for a more permanent solution.
-
No Slouch Boot Straight: This technique ensures your boots stay straight and prevents any unsightly bunching.
Tip: Adjust the strip length to fit your boot size, ensuring they don’t poke out or cause discomfort.
These methods are simple yet effective ways to reinforce boot ankle diy and keep your boots looking and feeling great. Next, we’ll explore how to prevent and fix slouchy boots, ensuring they stay in top shape.
Preventing and Fixing Slouchy Boots
Flexing the Boot Shaft
Slouchy boots can be a real nuisance, but there’s a simple fix: boot shaft flexing. This technique helps your boots maintain their shape and stay upright.
-
Flex the Shaft: Gently bend the boot shaft back and forth. This mimics the natural motion your ankle makes when walking and helps loosen up the leather.
-
Ankle Flexing: Pay special attention to the ankle area. Flexing here can prevent the shaft from collapsing and provide better support.
-
Side Seam Flexing: Push the side seams from the inside out. This reduces stiffness and prevents those pesky seams from digging into your ankles.
Tip: Regularly flexing the shaft and seams can keep your boots in top shape and comfortable to wear.
Addressing Side Seams and Heel Counter
Side seams and heel counters are common problem areas that can cause discomfort and slouching. Here’s how to tackle them:
-
Side Seams: Use the ball bat technique to soften the side seams. Gently roll a ball bat or similar object over the seams to reduce their stiffness.
-
Heel Counter: Push in at the top of the heel counter with your thumb. This softens the area, preventing heel slippage and ensuring a snug fit.
-
Heel Slipping Prevention: To further prevent heel slippage, flex the heel counter repeatedly. This makes it more pliable and adapts better to your foot shape.
Tip: These techniques not only improve comfort but also help maintain the structural integrity of your boots.
Preventing and fixing slouchy boots doesn’t have to be a challenge. With these simple DIY techniques, your boots can stay supportive and stylish. Next, we’ll dig into frequently asked questions about reinforce boot ankle diy to help you get the most out of your footwear.
Frequently Asked Questions about Reinforce Boot Ankle DIY
How can I make my boots more supportive?
Making your boots more supportive can be a game-changer, especially if you’re on your feet a lot. Here are a few DIY tips to improve support:
-
Padded Insoles: Add impact-reducing insoles to your boots. These can provide extra cushioning and support for your feet, helping to distribute pressure evenly.
-
Moleskin Patches: Use moleskin patches on areas of the boot that cause discomfort. These patches can cushion pain points and prevent rubbing.
-
Stretching Techniques: Properly stretch your boots using a stretching fluid or the flex-break-in method. This ensures a better fit and reduces pressure on specific areas of your foot.
How to prevent boots from cutting ankle?
Boots cutting into your ankles can be painful, but there are ways to prevent this:
-
Leather Conditioner: Regularly apply a leather conditioner like Chamberlain’s Leather Milk to soften the leather. This reduces stiffness and prevents the leather from cutting into your skin.
-
Ankle Flexing: Focus on ankle flexing to make the boot more pliable around this area. This helps in creating a more comfortable fit.
-
Moleskin or Padding: Apply moleskin or other padding materials to the areas where the boot cuts into your ankle. This adds a protective layer between your skin and the boot.
How to get boots on with no zipper?
Getting boots on without a zipper can be tricky, especially if they’re new or stiff. Here are some tips:
-
Use a Boot Horn: A boot horn can be a lifesaver. It helps guide your foot into the boot without crushing the heel counter.
-
Warm the Leather: Gently warming the leather with a hairdryer can make it more pliable. Be careful not to overheat, as this can damage the leather.
-
Stretch Gradually: If the boots are particularly tight, consider using a boot stretcher or wearing them with thick socks around the house to gradually stretch them out.
These frequently asked questions address common challenges with reinforce boot ankle diy techniques. By using these strategies, you can improve the comfort and longevity of your boots. Up next, we’ll explore how to stiffen leather boots at home for those who need a sturdier fit.
Conclusion
When it comes to extending the life of your beloved boots, sometimes a little DIY can go a long way. However, for those times when your boots need professional care, NuShoe is here to help. With our expertise in handcrafted shoe renewal, we’ve repaired over 5 million pairs of shoes since 1994, making us a trusted name in the footwear industry.
Our commitment to sustainability means that we focus on extending the life of your footwear, reducing waste, and keeping your favorite shoes out of the landfill. Whether it’s through our exclusive repair programs for national brands or our dedication to using environmentally friendly practices, we aim to provide a service that not only benefits your footwear but also the planet.
For those tricky boot problems that need more than a DIY fix, consider our professional repair services. We offer a range of solutions custom to your needs, ensuring that your boots are not only comfortable but also durable for many trips to come.
Ready to give your boots the professional care they deserve? Learn more about our shoe repair services and find how we can help you keep your footwear in top condition.
Whether you’re tackling a reinforce boot ankle diy project or seeking expert assistance, taking care of your boots is an investment in comfort, style, and sustainability.