

Why Finding the Right Glue to Fix Boots Makes All the Difference
Glue to fix boots can be the difference between saving your favorite pair and tossing them in the trash. Here’s what you need to know:
Best Boot Repair Glues:
| Adhesive | Best For | Cure Time | Key Benefit |
|---|---|---|---|
| Aquaseal SR | Hiking boots, waterproof repairs | 24 hours | Flexible rubber cure, abrasion resistant |
| Shoe Goo | Heavy use, trail boots | 24-72 hours | Long-lasting flexibility |
| Barge Cement | Professional repairs, leather | 15 minutes dry | Strong initial bond |
| Boot-Fix | Quick repairs, all materials | Under 1 minute | Professional-grade instant bond |
| Flex Glue | Casual boots, light use | 24-48 hours | Easy application |
If you’re facing a delaminating sole on boots you love, you’re not alone. One hiker found their ten-year-old trekking boots had separated soles but were otherwise perfect. After a professional refurbishment, those boots held strong for over 100 kilometers of walks—extending their life by months for about 20% of replacement cost.
The real question isn’t whether gluing works, but which glue and technique will give you reliable results. Some repairs last years, while others fail after a few kilometers. The difference comes down to choosing the right adhesive for your boot material, preparing surfaces properly, and understanding when DIY makes sense versus professional repair.
I’m Eric Neuner, founder of NuShoe Inc, America’s finest shoe repair service since 1994. Over three decades, we’ve handled millions of pairs of footwear repairs and refurbishments, and I’ve seen every possible scenario where the right glue to fix boots saved quality footwear from landfills.

Glue to fix boots terms to learn:
Understanding Why Soles Fail and When to Use Glue to Fix Boots
Before you reach for a tube of adhesive, it helps to understand why your boots are falling apart in the first place. It’s rarely just “bad luck.” Most boot sole failures are caused by a chemical process called hydrolysis.
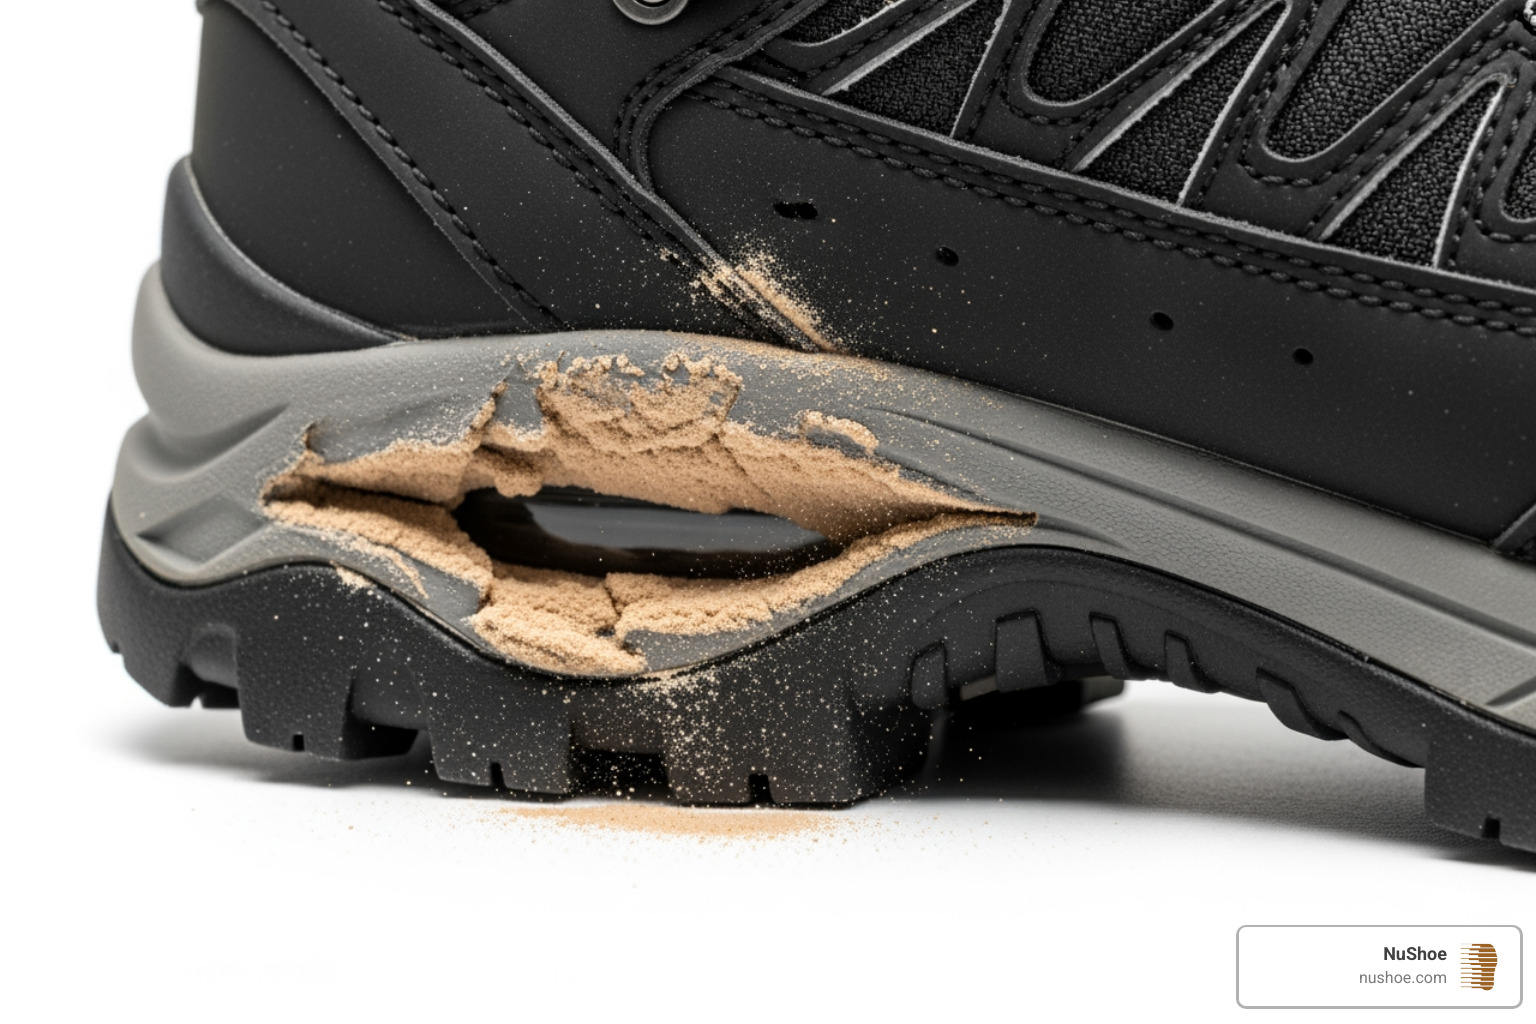
Hydrolysis is the chemical breakdown of a compound due to reaction with water. In footwear, this specifically targets polyurethane (PU) midsoles. Over time, moisture from the air gets into the PU foam, causing it to lose its elasticity and eventually crumble into a fine powder. If you see your midsole looks like it’s “rotting” or turning into cake crumbs, no amount of glue to fix boots will solve the problem because the material itself is disintegrating. In these cases, a full sole replacement is necessary.
However, if the sole is simply peeling away but the materials are still solid, you’re likely dealing with factory glue failure. Adhesives used in mass production can dry out and become brittle after 5 to 10 years, especially if the boots have been stored in a hot attic or a damp garage. Heat exposure is a major culprit; leaving boots near a campfire or in a hot car can soften the original shoe adhesive repair and cause the layers to shift.
Many modern boots use Styrene-butadiene, a synthetic rubber that provides excellent grip and durability but requires very specific bonding agents to stay attached to leather or fabric uppers. Understanding these materials is why we at NuShoe emphasize that the “all-purpose” glue in your junk drawer usually won’t cut it.
Top-Rated Adhesives: Finding the Best Glue to Fix Boots
Not all glues are created equal. When you are looking for the best glue for shoe soles, you need something that is waterproof, heat-resistant, and—most importantly—flexible. Your feet bend with every step; if your glue dries into a hard, brittle plastic, it will crack and fail within the first mile.
Here are the heavy hitters in the repair world:
- Aquaseal SR: This is a urethane-based adhesive that dries into a tough, clear, flexible rubber. It is arguably the best waterproof shoe repair adhesive for rugged outdoor gear. It’s excellent for rebuilding worn-down heels or sealing leaks.
- Shoe Goo: A classic for a reason. It’s a thick, viscous glue that fills gaps well. While it takes longer to cure (up to 72 hours for a full bond), it offers incredible vibration resistance.
- Boot-Fix: This is a professional-grade cyanoacrylate (super glue) specifically formulated for footwear. Unlike household super glue, it stays flexible. It bonds almost instantly, making it great for quick fixes.
- Barge Cement: This is the cement glue for shoes that professionals use. It’s a contact adhesive, meaning you apply it to both surfaces, let them dry until tacky, and then press them together for a permanent bond.
- Flex Glue: Known for its “instant grab,” this works well for casual boots where you don’t want to mess with complicated clamping setups.
Safety Note: Many effective shoe glues contain Toluene. For our friends in California, please be aware of the California Prop 65 Warning for Toluene, as it is a chemical known to cause reproductive harm. Always use these products in a well-ventilated area.
Specialized Glue to Fix Boots by Material
The material of your boot dictates the chemistry of the glue you should use.
- Leather: Leather is porous and “breathes.” You need an adhesive that won’t chemically burn the hide. Check out our glue for leather ultimate guide for deep dives into bonding skins. For high-end leather, the best glue for shoe leather is typically a specialized contact cement.
- Rubber and Vibram: These dense materials are notoriously difficult to bond. If you’re wondering what is the best glue for rubber shoe sole repair, look for urethane-based glues like Aquaseal SR. They “bite” into the rubber better than standard adhesives.
- Gore-Tex and Canvas: Fabric uppers require a glue that won’t soak through and create a hard spot that causes blisters. Urethane glues are usually safe here as they sit on the surface rather than saturating the fibers.
Professional Grade Glue to Fix Boots for Instant Bonds
Sometimes you don’t have 24 hours to wait for a cure. Professional grade glue application often involves high-viscosity “instant” glues like Boot-Fix. This shoe adhesive glue is designed to resist high heat and extreme cold, ensuring that the bond doesn’t snap when you transition from a warm house to a snowy trail. These professional glues are specifically engineered for impact resistance—they can handle the “thump-thump” of a heavy stride without the bond line shattering.
Step-by-Step Guide: How to Glue Your Boot Soles Properly
Getting a bond to hold isn’t just about the glue; it’s 90% about the preparation. If you glue over dirt or old, flaky adhesive, your repair will fail. Guaranteed.
- Clean the Surfaces: Use a stiff brush to remove all dirt. Then, use 70% isopropyl alcohol to wipe down both the sole and the boot bottom. This removes oils and residues that prevent sticking.
- Remove Old Glue: This is the step most people skip. Use how to glue shoes best practices by scraping away any old, brittle factory glue.
- Abrade (Sand) the Material: Use 80-grit sandpaper to roughen up both surfaces. This creates “teeth” for the glue to grab onto.
- Apply the Adhesive:
- If using a contact cement, apply a thin layer to both sides, wait 15 minutes until it’s tacky, then press together.
- If using a urethane glue, apply to one side and spread evenly.
- Clamp and Wait: This is crucial. Use C-clamps, heavy rubber bands, or even wrap the boot tightly in duct tape. You need constant pressure.
- Cure Time: While some glues “set” quickly, you should wait a full 24 hours before wearing the boots. If you’re wondering how long does it take for shoe glue to dry, the answer for a permanent fix is always “longer than you think.” A contact adhesive shoe repair might feel dry, but it needs time to chemically bond.
DIY vs. Professional Repair: Is Gluing Enough for Heavy Use?
Is a DIY fix with glue to fix boots really as good as a professional job? The data suggests there is a significant gap. In community tests, DIY repairs on hiking boots often fail after just a few kilometers of heavy trekking, whereas a professional refurbishment can last for over 100km of rigorous use.
At NuShoe, we don’t just use glue. We use industrial-grade presses and, when the boot construction allows, we reinforce the bond with structural stitching. A DIY repair is an excellent way to extend the life of a casual boot or to get through a weekend trip, but for work boots or high-stakes mountaineering, the shoe sole sticking glue alone may not be enough to ensure safety.
Think of it as a cost-benefit analysis. A DIY tube of glue costs $10. A professional repair might cost $30-$50 but can add years to a $200 pair of boots. We’ve seen repairs extend boot life by several hundred miles, making the cost-per-mile incredibly low. Plus, there is the History of shoe care and polish) to consider—well-maintained boots look better and stay waterproof longer. For more on this, see our best boot repair glue guide.
Frequently Asked Questions about Boot Repair
Can I use Gorilla Glue to fix boots?
Technically, yes, but with a major warning. Original Gorilla Glue is moisture-activated and expands into a rigid foam as it cures. This expansion can push the sole away from the boot or seep into the insole, creating uncomfortable hard lumps. If you must use it, use their “Neo” or “Clear” versions which are less prone to expansion. Generally, we find is gorilla glue good for shoe repair to be a “maybe” for emergencies, but a heavy duty shoe glue specifically made for footwear is always better.
How do I fix leaking boots or peeling rands?
The “rand” is the rubber strip that runs around the edge of the boot where the upper meets the sole. When this peels, it lets in water. Aquaseal SR is the perfect shoe glue for fabric and rubber rands because it creates a 100% waterproof seal. Simply clean the gap, inject the glue, and tape it down tight. This same technique works for trainer repair glue applications on sneakers.
What are the most common mistakes in DIY boot gluing?
The #1 mistake is poor cleaning. If there is even a hint of dust, the glue will bond to the dust, not the boot. The #2 mistake is over-application; more glue does not mean a stronger bond. It just means a messier “squeeze-out” that is hard to clean. Finally, ignoring cure times is a recipe for disaster. If the tube says 24 hours, don’t try to walk in them after four. Using the right glue to stick shoe sole requires patience. Also, try to find a non toxic shoe glue if you are working indoors without ventilation.
Conclusion
Repairing your boots is more than just a way to save a few bucks—it’s a commitment to sustainability and quality. At NuShoe, we’ve spent decades perfecting the art of handcrafted renewal. Since 1994, we have repaired over 5 million pairs of shoes, helping our customers reduce waste and keep their favorite gear on the trails.
While a DIY fix with the right glue to fix boots can be a great temporary solution, nothing beats the durability of a professional refurbishment. Whether you’re wearing Dr. Martens, Birkenstocks, or technical hiking boots, our expert craftsmen can restore them to like-new condition.
Ready to give your boots a second life? Visit our Professional Shoe Repair Services page to see how we can help you keep walking for hundreds of miles to come.